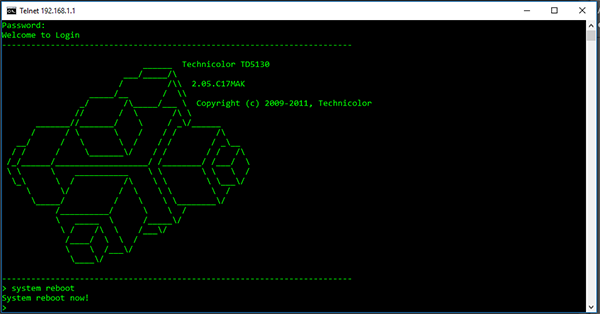
Today, we know how to restart the router via the CMD command line in Windows. Before that, you will first need to activate telnet commands in Windows.
The way to do this is very easy enough to click on the Windows icon in the keyboard with the letter "R". In the window that appears you type the following command: and click Enter.
The way to do this is very easy enough to click on the Windows icon in the keyboard with the letter "R". In the window that appears you type the following command: and click Enter.

A new window will appear that searches for "telnet client" and selects it and clicks "OK". And wait some time until the activation is done.

Now I have finished the first step and you have canceled Telnet commands on the Winds and you can manage your own router through the command line.
What you need now is to open the command line "CMD" and connect to the router through the following command "telnet" followed by the IP of the router example: telnet 192.168.1.1

After the previous command is executed you will be asked to enter the user name and password of the router.

When you connect to the router you can execute and control many commands completely. Among these orders, of course, to restart the router and to do so enough to write one of these orders according to the router that owns:

reboot
set reboot
system reboot
Note: You can also use "PuTTY" to do the same thing:
set reboot
system reboot
Note: You can also use "PuTTY" to do the same thing:


